On December 11, 2022 the KiCad team announced support for macOS universal builds in the 6.99 nightly releases. Using a universal build greatly simplifies the process of setting up database libraries and is strongly recommended. If you are using a universal nightly build released after December 12, 2022 (the file starts with kicad-unified-universal), make sure to follow the updated instructions found here:
https://cdwilson.dev/articles/kicad-database-libraries-on-macos/
Overview Link to heading
A new “Database Libraries” feature was recently added to the KiCad macOS Nightlies (6.99) and is scheduled to be officially released in KiCad 7. Here’s an overview from the documentation:
A database library is a type of KiCad symbol library that holds data about parts in an external SQL database. Database libraries do not contain any symbol or footprint definitions by themselves. Instead, they reference symbols and footprints found in other KiCad libraries. Each database library entry maps a KiCad symbol (from another library) to a set of properties (fields) and usually a KiCad footprint (from a footprint library).
Using database libraries allows you to create fully-defined parts (sometimes called atomic parts) out of KiCad symbols and footprints without needing to store all the part properties in a symbol library. The external database can be linked to third-party tools for managing part data and lifecycles. Database library workflows are generally more complex than the standard KiCad library workflows, and so this type of library is typically only used in situations where it makes managing a large library of fully-defined parts more efficient (such as in organization or team settings).
In this article, I’m going to show you how to configure KiCad to use a SQLite-based database library with KiCad on macOS running on Apple Silicon.
SQLite ODBC Driver setup on macOS Link to heading
The initial implementation of the database libraries feature only supports Open Database Connectivity (ODBC) connections to SQL databases. An ODBC driver is needed to provide a translation layer between KiCad and the underlying SQL database implementation (SQLite, Postgres, etc).
Normally, the SQLite and the SQLite ODBC driver can be simply installed via homebrew:
brew install sqlite sqliteodbc
However, KiCad is currently compiled as an Intel (x86_64) application and runs on Apple Silicon using the Rosetta translation layer. As a result, KiCad requires an ODBC driver compiled for the same architecture (x86_64). Running brew install sqliteodbc on homebrew for Apple Silicon will install the ODBC driver compiled for arm64, rather than the x86_64 one. This will cause an error like the following:
Symbol library 'qa_dblib' failed to load.

Could not load database library: could not connect to database KiCad (/Users/vagrant/kicad/thirdparty/nanodbc/nanodbc/nanodbc.cpp:996: 0100: [unixODBC][Driver Manager]Can't open lib '/opt/homebrew/Cellar/sqliteodbc/0.9998/lib/libsqlite3odbc.so' : file not found )
Instead, we need to install homebrew for x86_64, and use that homebrew to install sqliteodbc for x86_64.
Install Rosetta 2 Link to heading
Make sure Rosetta2 is installed:
/usr/sbin/softwareupdate --install-rosetta --agree-to-license
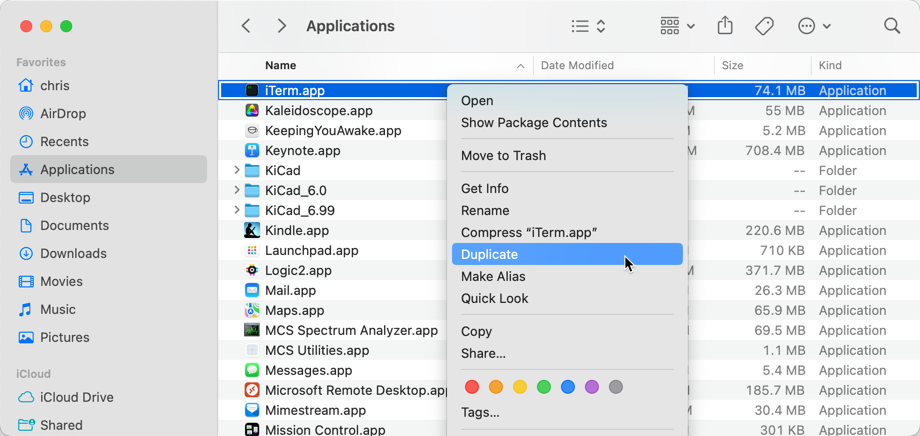
Create a duplicate terminal app that runs under Rosetta 2 (x86_64) Link to heading
Create a duplicate terminal app (iTerm.app, Terminal.app, etc):
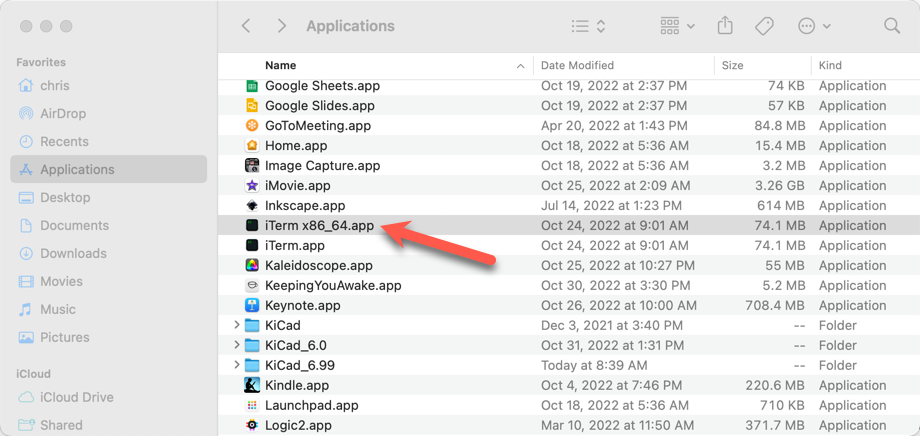
Rename the duplicate terminal app to make it clear that it’s running under Rosetta2 (I appended x86_64 to the app’s file name):
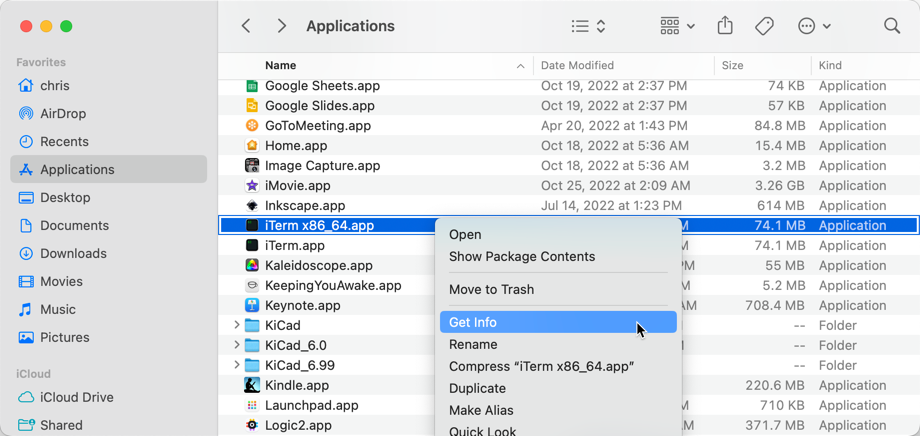
Right click on the duplicate terminal app and choose “Get Info”:
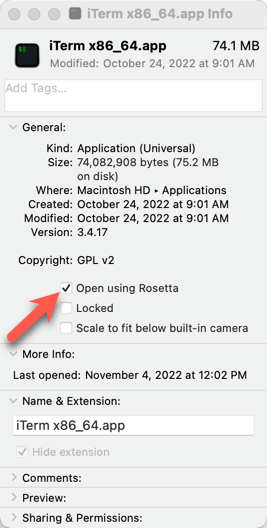
Check the “Open with Rosetta” checkbox:
Install homebrew for x86_64 Link to heading
Open the duplicate x86_64 terminal app and install homebrew:
/bin/bash -c "$(curl -fsSL https://raw.githubusercontent.com/Homebrew/install/HEAD/install.sh)"
Install the SQLite ODBC Driver Link to heading
Install the x86_64 SQLite ODBC Driver:
brew install sqliteodbc
Install GUI Apps Link to heading
Install DB Browser for SQLite from https://sqlitebrowser.org/dl/ to browse and edit SQLite database files.
Install iODBC driver manager from https://www.iodbc.org/dataspace/doc/iodbc/wiki/iodbcWiki/Downloads to manage the ODBC driver configuration.
Configure the ODBC Driver Link to heading
If ~/Library/ODBC/ doesn’t already exist, you’ll get the following error when trying to save “User” settings in the iODBC driver manager:

So, make sure the directory exists:
mkdir -p ~/Library/ODBC/
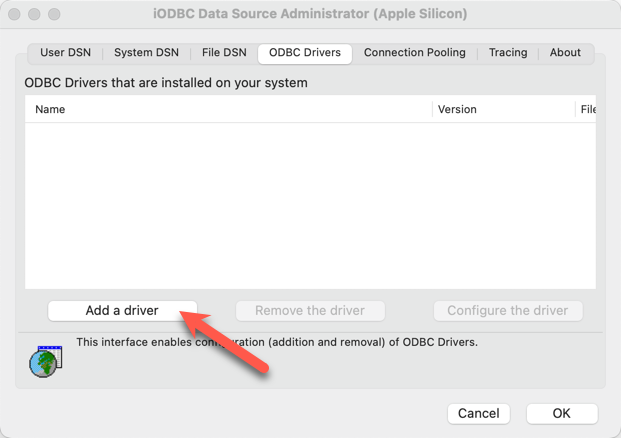
Run iODBC Administrator.app and open the “ODBC Drivers” tab.
Click the “Add a driver” button:
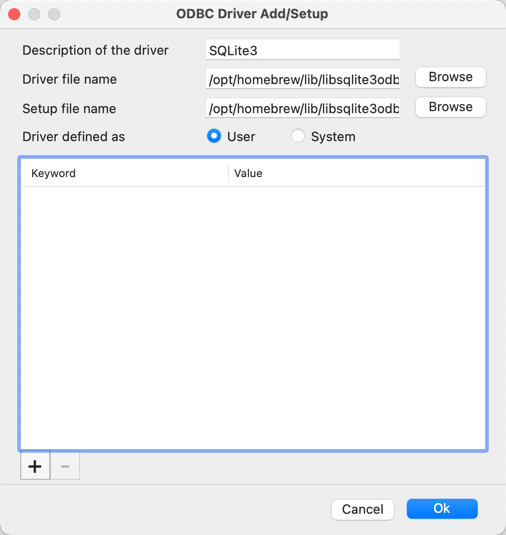
In the dialog box, input the following settings and click “OK”:
Description of the driver: SQLite3
Driver file name: /usr/local/lib/libsqlite3odbc.dylib
Setup file name: /usr/local/lib/libsqlite3odbc.dylib
Driver defined as: User
Click “OK” to save the settings:
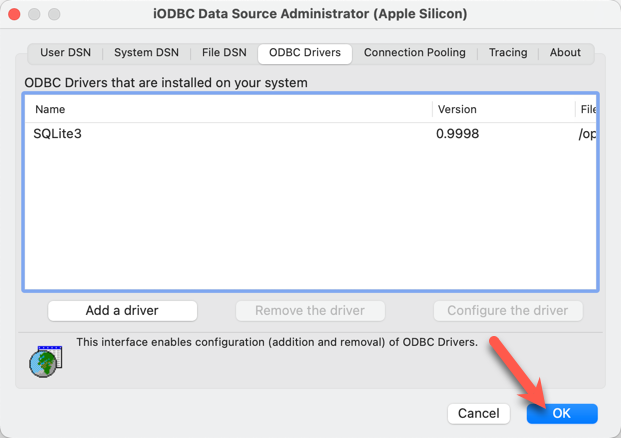
This will write the following ODBC configuration files to ~/Library/ODBC:
odbc.iniodbcinst.ini
In this simple example, odbc.ini will be empty and odbcinst.ini should contain the following config:
[ODBC Drivers]
SQLite = Installed

[SQLite]
Driver = /usr/local/lib/libsqlite3odbc.dylib
Setup  = /usr/local/lib/libsqlite3odbc.dylib
Create a test KiCad project Link to heading
Now that SQLite and the SQLite ODBC driver are set up, we can test the new KiCad database library feature.
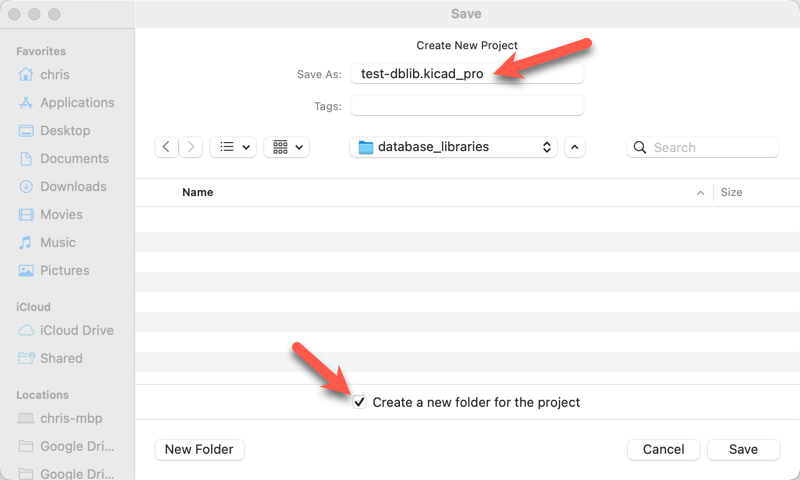
Create a new KiCad project test-dblib:
For simplicity, we’re going to use a pre-made database library provided by the KiCad developers.
Download the following files from https://gitlab.com/kicad/code/kicad/-/tree/master/qa/data/dblib:
database.sqliteqa_dblib.kicad_dbl
Copy both of these files into the KiCad project directory:

Open the qa_dblib.kicad_dbl file in a text editor and make sure the Driver and Database values are correct. The value for Driver should match the value specified in odbcinst.ini, which in this example is SQLite3. The value for database is ${CWD}/database.sqlite since the SQLite database file is located in the same directory as the .kicad_dbl file.
{
    "meta": {
        "version": 0,
        "filename": "qa_dblib.kicad_dbl"
    },
    "name": "QA Database",
    "description": "A database for testing purposes",
    "source": {
        "type": "odbc",
        "dsn": "",
        "username": "",
        "password": "",
        "timeout_seconds": 2,
        "connection_string": "Driver={SQLite3};Database=${CWD}/database.sqlite"
    },
    "libraries": [
        ...
    ]
}
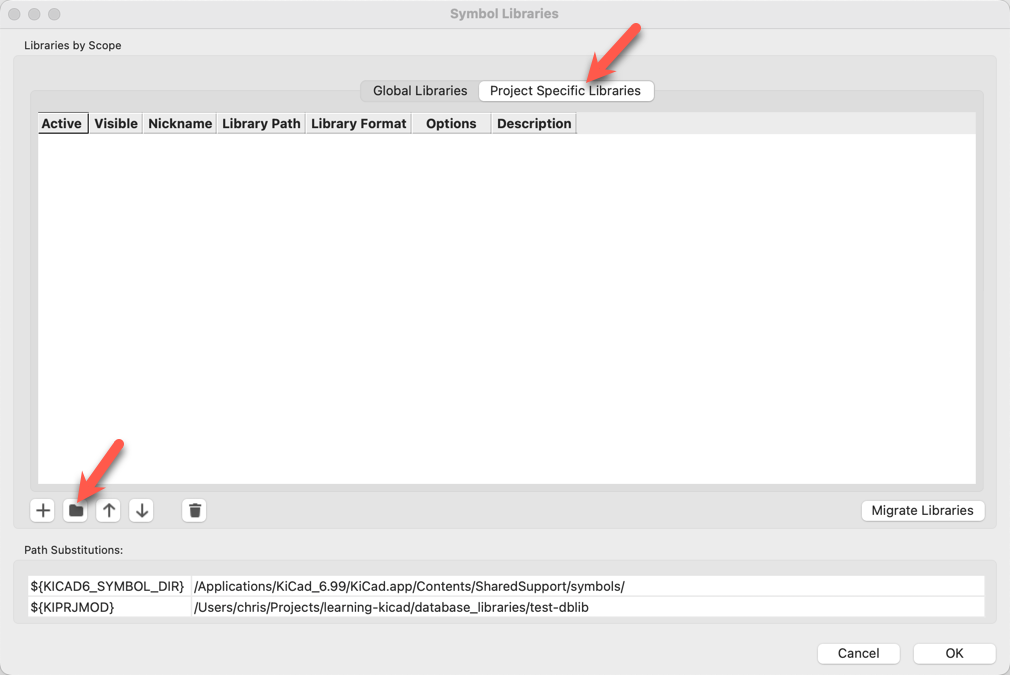
Open the Symbol Libraries editor by clicking on “Preferences” → “Manage Symbol Libraries…” and then click on the “Project Specific Libraries” tab (this process is the same if you wanted to add this to the global libraries instead).
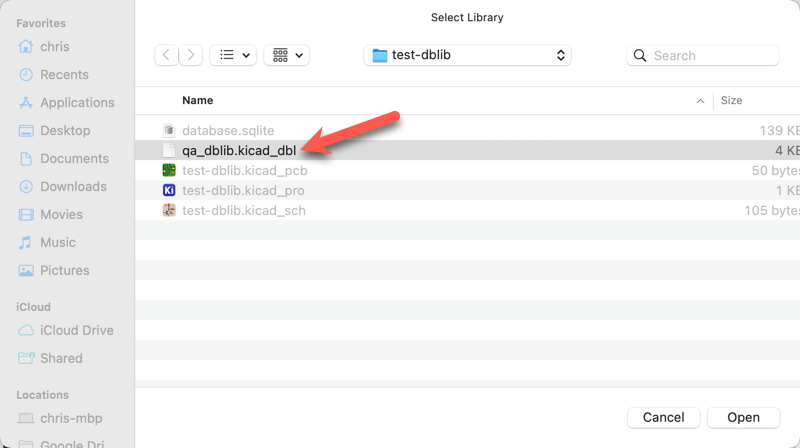
Select the qa_dblib.kicad_dbl in the file chooser:
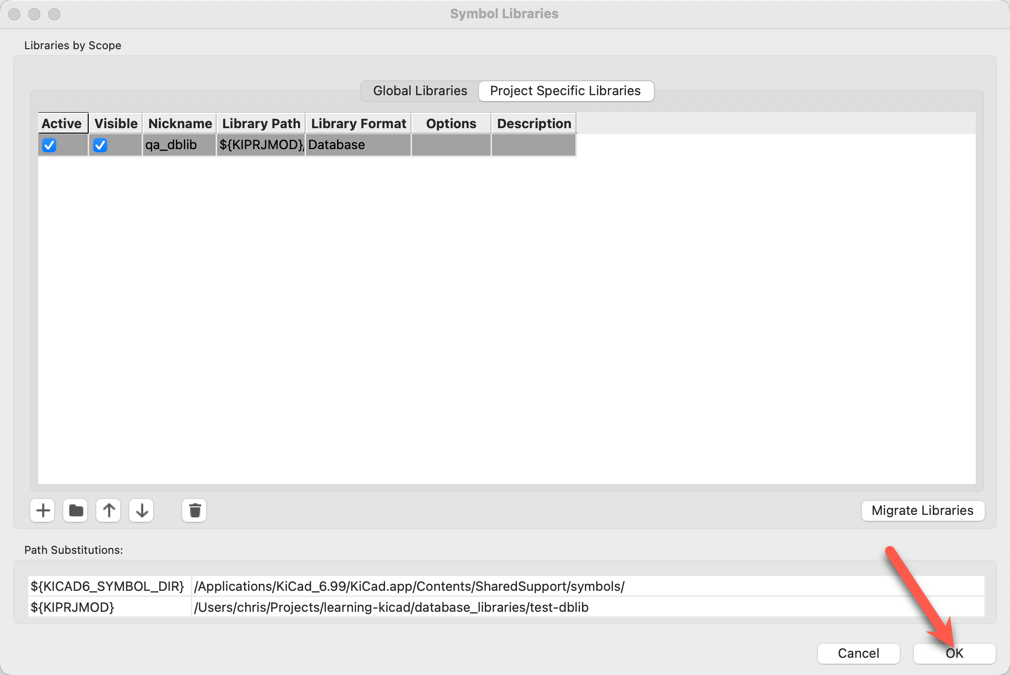
Click OK to add the database library to the symbol library table:
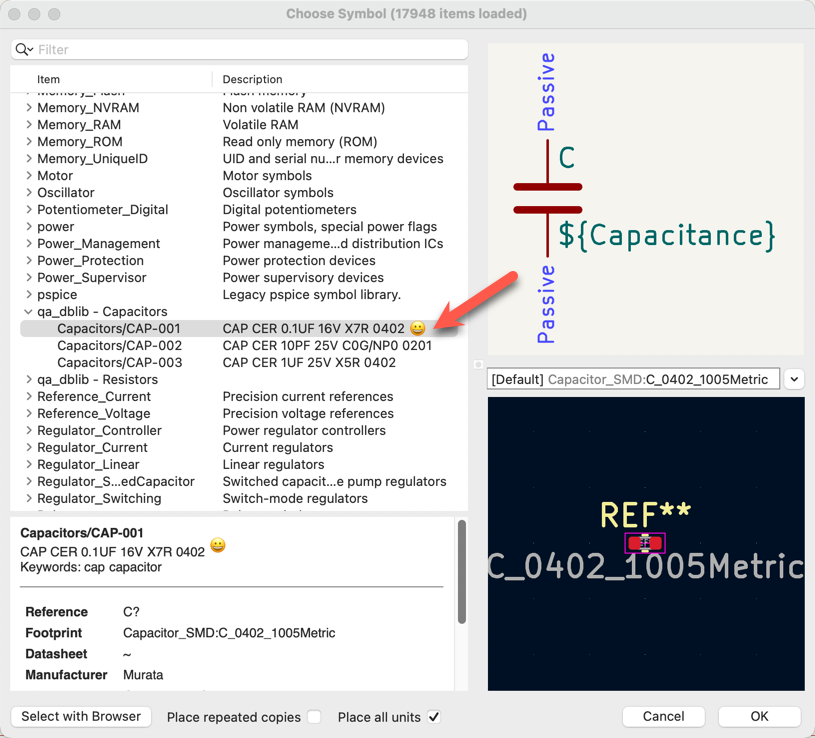
Now, open the schematic, choose “Place” → “Add Symbol”, and you should be able to choose a symbol from the database library! 🥳
Browse the database directly Link to heading
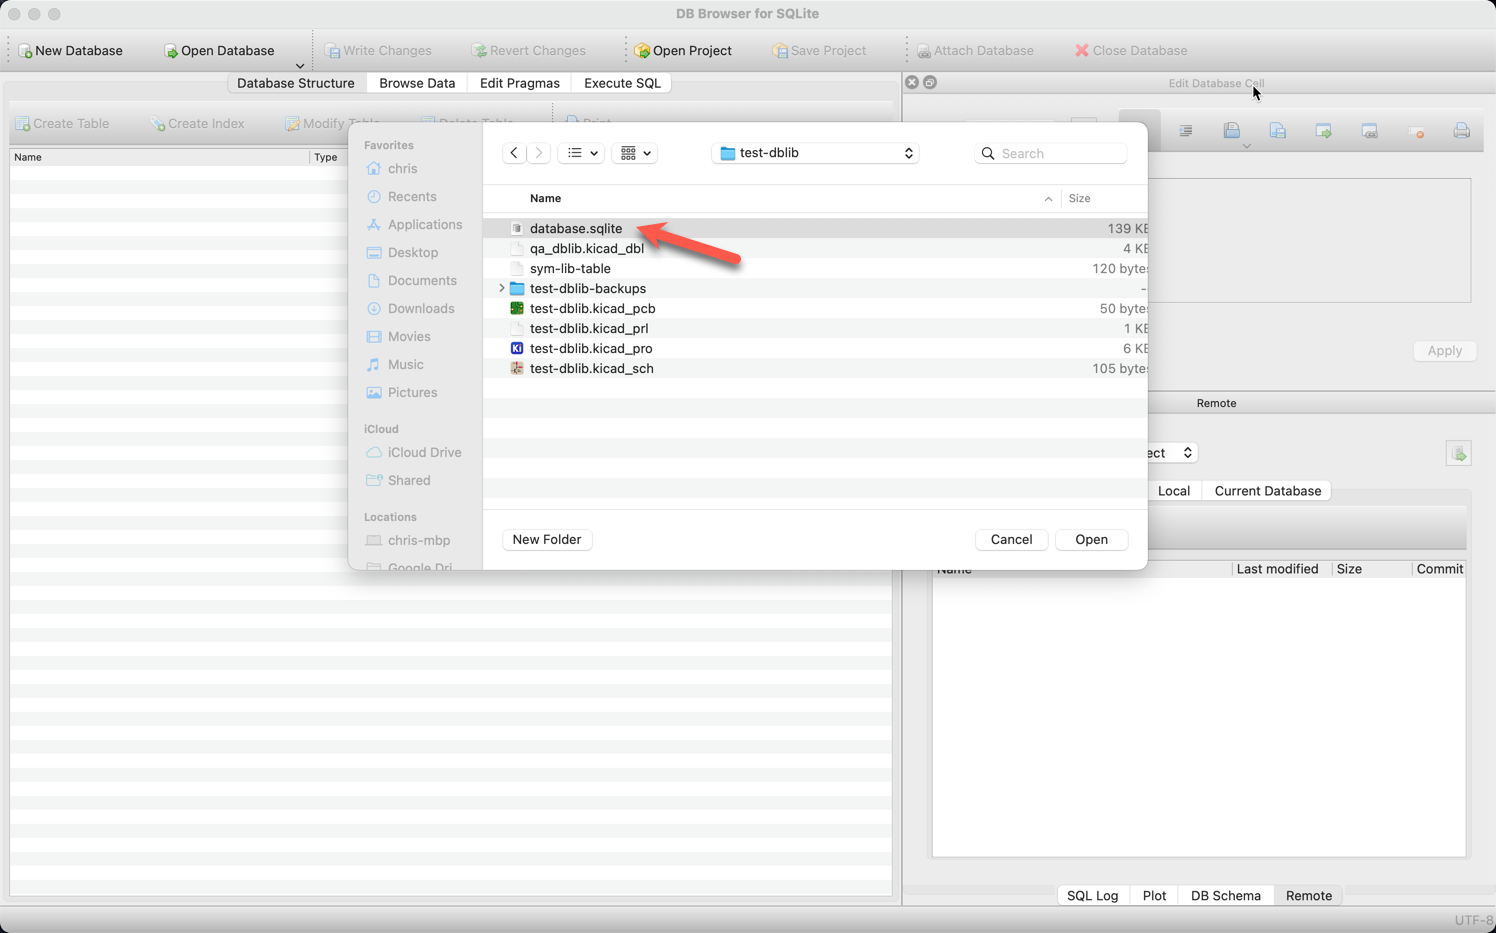
You can browse/edit the SQLite database file directly using the DB Browser for SQLite.app. Open the database.sqlite library file in DB Browser for SQLite:
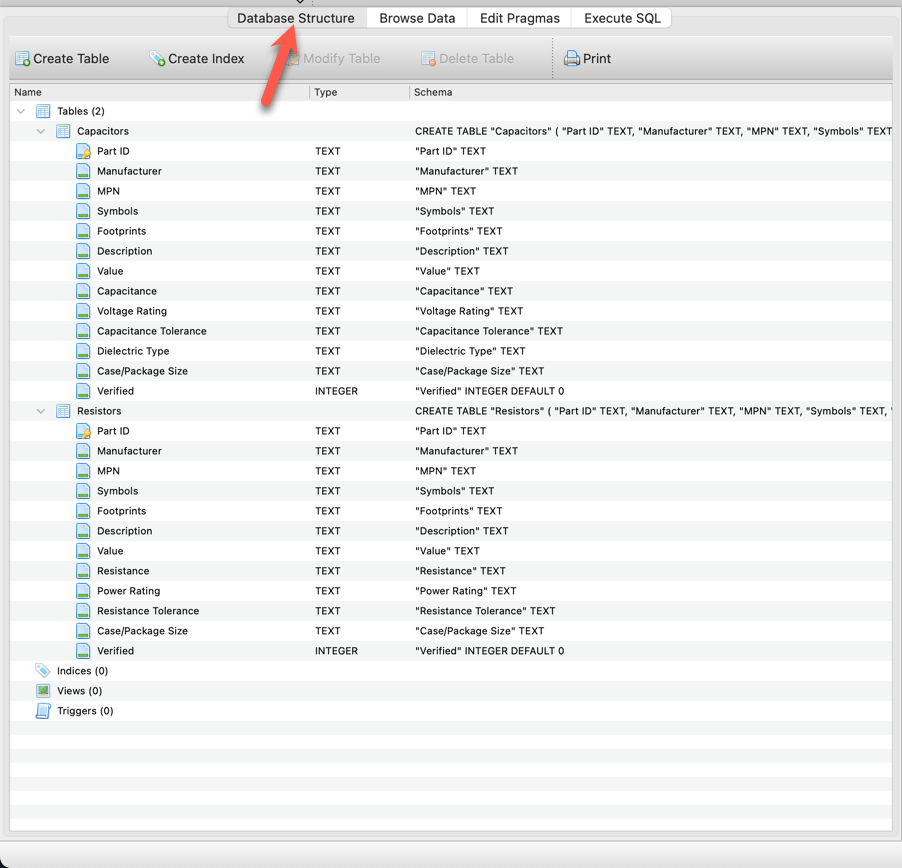
You can view the database schema:
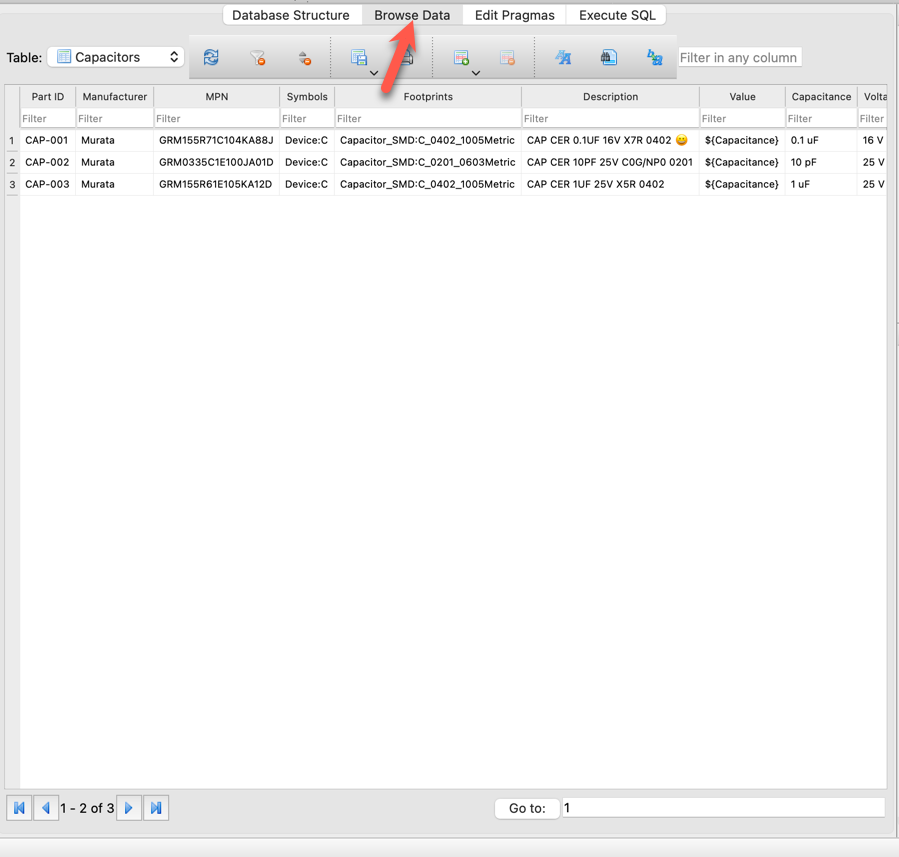
Or browse the data contained in the tables:
Feedback Link to heading
Anything I got wrong? Let me know in the comments below.